
No-Makeup Makeup Look: Products and Step-by-Step Placement
Published · Updated
Short answer
The no-makeup makeup look uses a few sheer, mostly cream products placed only where the skin needs them: a tinted moisturiser or skin tint, concealer matched to your skin, cream blush, brow gel and a tinted lip balm. Leave clear areas bare, blend with fingers or a damp sponge, and skip heavy powder, which reads flat and obvious, especially on camera.
Sophia Chen
Senior Skincare & Ingredients Editor · Editor Bio → · How we research →
INCI-vetted cosmetics, clean certification checklists, and breathable coverage.
Key Takeaways
- The no-makeup makeup look uses five lightweight products to enhance natural skin rather than mask it.
- You apply product only where your skin displays redness or dark shadows, leaving clear areas untouched.
- Liquid and cream formulas mimic natural skin reflection far better than heavy matte powders.
- You must match your concealer to your exact skin tone instead of choosing a shade that is three tones lighter.
- If you have an oily T-zone, apply a micro-milled translucent powder only to the center of your forehead and sides of your nose.
What Is the No-Makeup Makeup Technique?
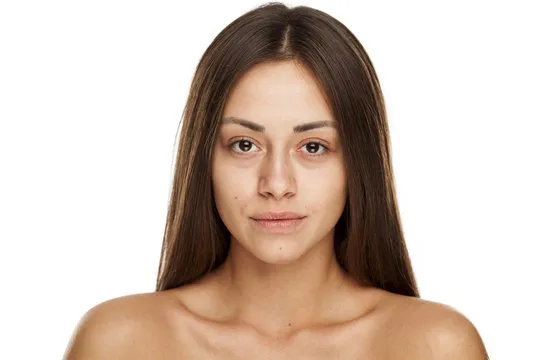
Direct Answer: The no-makeup makeup look is an editorial technique that unifies uneven skin tone and defines facial architecture while keeping skin texture visible. Unlike full-glam cosmetic routines that use opaque foundations and structured contours, this approach relies on sheer humectant skin tints, pinpoint cream concealers, and dewy cream blushes. The result looks like rested, healthy skin rather than applied cosmetics.
Most people fail at this technique because they use the wrong tools and formulas. If you apply full-coverage foundation, thick setting powder, and dark eyebrow pencils, the makeup becomes instantly visible on camera and in direct sunlight.
To achieve an imperceptible finish, you must adopt a zone-based placement strategy. You do not cover the whole face. You leave healthy skin bare and correct only shadows and redness.
No-Makeup Look vs Classic Glam Cosmetic Routine
The table below contrasts the product types, application methods, and visual results of each cosmetic approach:
| Cosmetic Factor | No-Makeup Makeup Look | Traditional Full-Coverage Glam |
|---|---|---|
| Base Formula | Sheer Skin Tint or [Serum Foundation](/glossary/foundation) | Full-Coverage Matte Liquid Foundation |
| Concealer Application | Pinpoint placement on blemishes and inner eye hollows | Broad triangular under-eye highlights |
| Blush & Bronze Texture | Translucent cream or gel formulas | Pressed powder contour and baked shimmer blush |
| Brow Architecture | Clear grooming gel brushed upward | Pomade-defined arches and carved concealer lines |
| Setting Protocol | Hydrating [Setting Spray](/glossary/setting-spray) and selective T-zone powder | Baking loose powder across the entire face |
The Essential Five-Product Kit
You need only five products to execute this look:
- Sheer Skin Tint: A breathable emulsion that unifies blotchy skin without hiding natural freckles.
- Cream Concealer: A pigmented cream that matches your exact jawline skin tone.
- Cheek & Lip Tint: A moisture-rich cream blush that blends seamlessly over bare skin.
- Clear Brow Gel: A flexible wax-gel that grooms eyebrow hairs into place.
- Nourishing Lip Oil: A lightweight lip oil or tinted balm that imparts shine without stickiness.
The Four-Step Face-Mapping Protocol
Follow these procedural instructions in order:
Step 1: Hydrate Skin Barrier & Wait 60 Seconds
                         │
                         ▼
Step 2: Press Skin Tint with Damp Sponge (Center Face Only)
                         │
                         ▼
Step 3: Pinpoint Concealer on Inner Eye Corners & Spots
                         │
                         ▼
Step 4: Tap Cream Blush High on Cheekbones & Finish with Mist
1. Prepare with a Hydrating Base
Cleanse your skin and apply a lightweight moisturizer. If your skin has enlarged pores, smooth a rice-grain drop of makeup primer across your nose and cheeks.
2. Press Skin Tint Across the Center Face
Dispense two drops of skin tint onto your fingertips or a damp sponge. Press the product into the center of your forehead, the bridge of your nose, and the apples of your cheeks. Blend outward toward your hairline. Do not apply product to your jawline or outer cheeks where skin is clear.
3. Pinpoint Conceal Only Where Necessary
Dip a small synthetic detail brush into your cream concealer. Dot the pigment directly onto the dark hollow at the inner corner of your eye and onto individual red spots. Use your ring finger to pat the edges until the product blends away. Do not paint wide triangles under your eyes.
4. Tap Cream Blush onto High Cheekbones
Smile gently and place a small drop of cream blush on the highest point of your cheekbones. Blend the color upward toward your temples. This lifts your facial structure without requiring artificial bronzer lines. Tap the remaining pigment onto the bridge of your nose and your lips.
5. Set Selectively
If your skin produces oil during the day, press a dusting of translucent powder onto the wings of your nose and between your eyebrows. Finish with two pumps of setting spray to melt all layers into the skin.
For beginner routines and minimalist essentials, explore our 4-Step Skincare Routine for Beginners and the full Makeup Artistry Pillar Guide.
Frequently Asked Questions
Can you do a no-makeup makeup look if you have active acne?
Yes. You apply a sheer skin tint over your entire face to keep the overall finish looking fresh and light. Then, you use a fine brush to apply full-coverage concealer directly onto each active blemish. This pinpoint method hides the breakout without creating a thick, mask-like layer across your healthy skin.
What is the best tool for applying skin tint?
Your clean fingers or a damp polyurethane makeup sponge provide the best result. The warmth of your fingertips melts cream products into your skin, creating a natural finish. A stiff synthetic brush can leave brush stroke marks on sheer products.
How do you keep natural makeup from fading by afternoon?
Make sure that your skincare underneath absorbs completely before you apply cosmetics. Finish your application with a fine mist of polymer-based setting spray. The spray creates a flexible, invisible film that prevents skin oils from breaking down your makeup.